Viser innlegg med etiketten interior. Vis alle innlegg

11/27/2011

Tutorial 27 - angel wings from paper

I really didn't feel like sewing today, besides, it's Sunday and I should be able to do what I want, so there. It's extremely windy here today, and my car broke down yesterday. On top of that I had to be at church - no car... we had to walk. It's not very far, but with all the wind, it's very tiring. It' so windy I didn't dare to get the girls to ride their bikes. I was afraid they would get blown over. On top of all of this (not complaining - we've had a beautiful 1st Sunday of advent) the power went - due to the wind, which meant no sewing machine. 

Because of ALL of this you're getting a paper craft today. The girls were in the bath when I finished it and hung it, when they came into the living room - they both exclaimed: "OH MOMMY!" - I guess they like it!
 It's a very quick project.
 You'll need: cardboard, news paper/old books/music notes, glue/mod podge and rope
 trace your wing on a pattern sheet - or a piece of paper, cut it out
 trace it on some cardboard - both wings
 get the news paper or old books, start to glue pieces in a criss cross pattern. I decided to use the colored side of the card board, an old ice cream box - the if someone looks at the back, it's just brown - or you can glue both sides.
 put glue on top of everything as well - let it dry
 tie the rope around the middle a few times, then put some rope around the rope in the wings and hang up.
We decided smaller versions of these would make perfect gift tags!
And tomorrow you'll get a.... I don't know yet - a good thing I only have three more to go - and don't get me wrong, I LOOOOVE this month of tutorials

11/26/2011

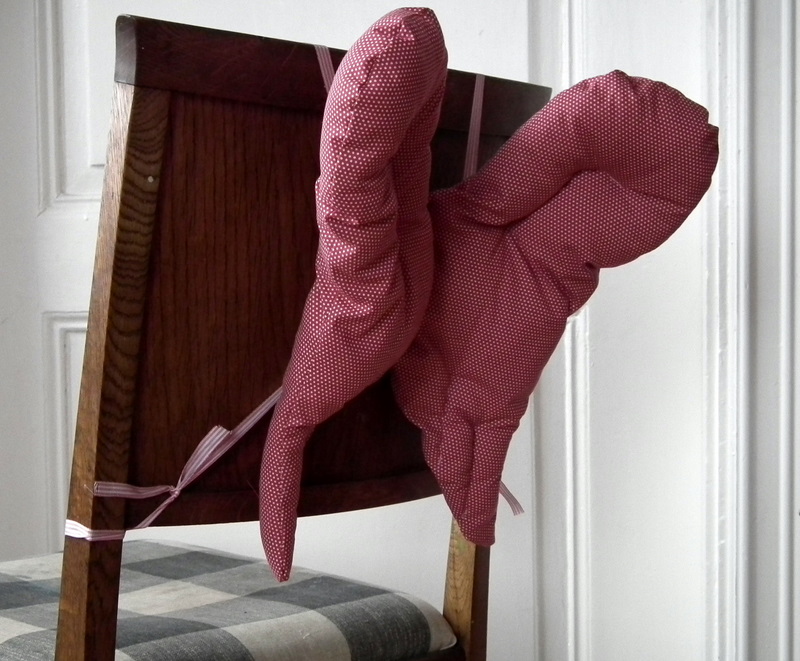
Tutorial 26 - angel wings for the chair

I had something else planned for today, but sitting here by the computer, I suddenly remembered an idea that passed through my head a few days ago, and I had to try. And I think it worked!

 Decorating the Christmas table with angel wings on the chairs! - And wouldn't this just be perfect as seating cards at a girl's birthday? I know I want to do this for my girls 7th party - with names on for each girl! Perfect
 Because they also fit so very well on the back.
 You need:
paper for drawing your pattern
fabric
ribbon
stuffing

1: draw your pattern - one of the wings
 place the pattern on a folded fabric - cut two
 2: sew on four pieces of ribbon - I use long ones on top and short ones on the bottom - on the second one I'll try to reverse this
 3: put the pieces together - right side towards right - tuck in the ribbon, sew all the way around, leaving a hole for turning and stuffing.
 4: Stuff however thick you want it, top stitch the hole
 5: add some texture by top stitching a pattern on the wings
 I'm really happy with this- I am making one for every chair around my dinner table - and adding the names of my girls and my nieces for the Christmas dinner!
One happy angel gt her wings - happy weekend!

11/21/2011

Tutorial 21 - H-owl-iday banner

Today I think I have my favorite tutorial so far for you guys - a holiday banner - or h-owl-iday banner...
 Of course you can write whatever you please, but I chose Noel for this tutorial, because I only needed four owls.... They were a lot quicker to put together than I thought, though, so I'll be making up a storm of these as Christmas presents.
 I used linen as my back piece on all the owls. Cut two identical pieces - or 8 if you want four owls. It's basically a square with a triangle on top and rounded corners at the bottom.
 Sew all the way around - right side towards right side.
 Cut a slit in the front piece, going horizontal - turn around.

 Top stitch a patch over the slit.
 Use letter stamps and ink and write what you want
 For the beak, sew with yellow or orange back and forth in a triangle, also fastening the top to the bottom.
 Cut two small circles of white felt, sew them on with some black thread - make sure they're not all the way to the top, you need some room for the rope on top.
 Thread a rope through the owls - in the letters right order....
 and have an owlastic time doing this!
 Aren't they kind of cute?
The sun was shining today, (Sunday - not Monday) and I figured it was time for the Christmas photo shoot - I was going to sew some off white fleece dresses for them, but nope, just didn't make it. It gets dark before I get home from work and we don't know what the weather will be next weekend... 
But with or without the clothes I had intended... we had a lot of fun - and I did get some shots I could use. The pictures are ordered - for half prize off! And all our friends and family will receive the Christmas cards this year as well.
Tomorrow I might have some special guests visiting, if not, the other girl's skirt will be presented.

11/19/2011

Tutorial 19 - pot stand

It's an easy project today....
 The felt ball pot stand
 You'll need: felt balls, a thick needle, thread and a pair of scissors. (or are you like me, using your teeth to cut the thread?)
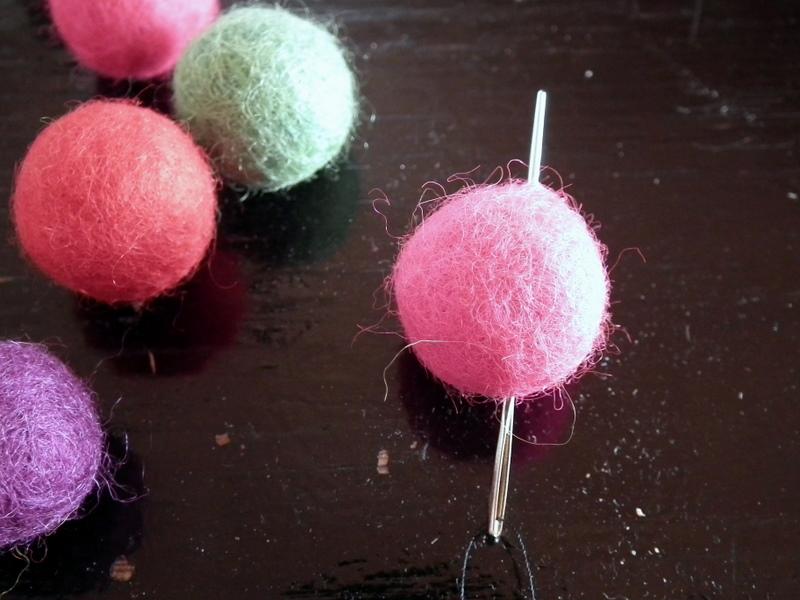
 Put a long piece of thread on the neelde, start sewing through the felt balls.
 In a long row.

 When you have the desired size of the pot stand, sew into the first balls again.

 I sewed into the first four balls again.
 Secure the thread
 And start using you pot stand. This is also an ideal craft for the little ones to do.

Tomorrow I'll show you a skirt Princess designed, just need to get some nice pictures of her wearing it first... Happy Saturday.

11/14/2011

Tutorial 14 - Coat hanger

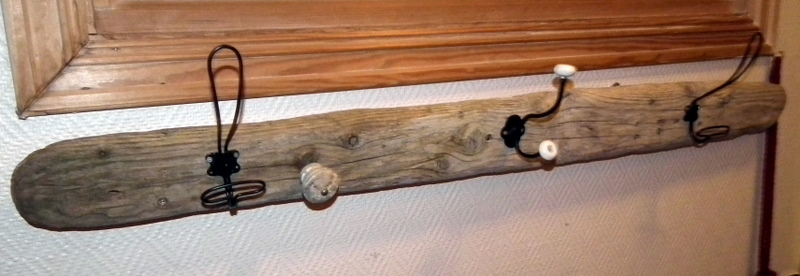
I told you you would get something for the hallway today - a coat hanger of drift wood.
 Find a nice piece of old wood - or use my tutorial to make aged wood.
 Screw some eye hooks on at the back.
 Screw coat hooks on at the front. I like to use different ones to make the look more complete.
 Screw screws in the wall for the eye screws and hang up.
An my girls have their own coat hanger.
And day 15 of the tutorials will come tomorrow!

11/06/2011

Tutorial 6 - aged wood memo board

I don't have a sewing project for you guys today - today you'll be bringing out your wood and rope and make an aged wood memo board.
 You'll need:
An aged piece of wood - or
a new piece of wood, vinegar and pot scrub
rope
wood stapler
 2 eye screws
 Above you can see my NEW piece of wood - I like wood when it looks more like drift wood.
I found this link on Pinterest, and decided to have a try at it. I didn't have apple cider vinegar, so I used white wine vinegar, and it worked wonderfully. I put on three coats last night, and this morning my wood looked like the picture below.
 When your wood is your desired color, take some rope, wine it around the board.
 Turn the board over, staple the rope, I used a lot of staples so that over time the rope will stay in it's place.
 Screw in two eye screws on top of the board and bind some rope between them.
And your aged wood memo board is done.
Happy Sunday  another tutorial tomorrow!!